Gardening in Pots Part 2 - Building the Garden
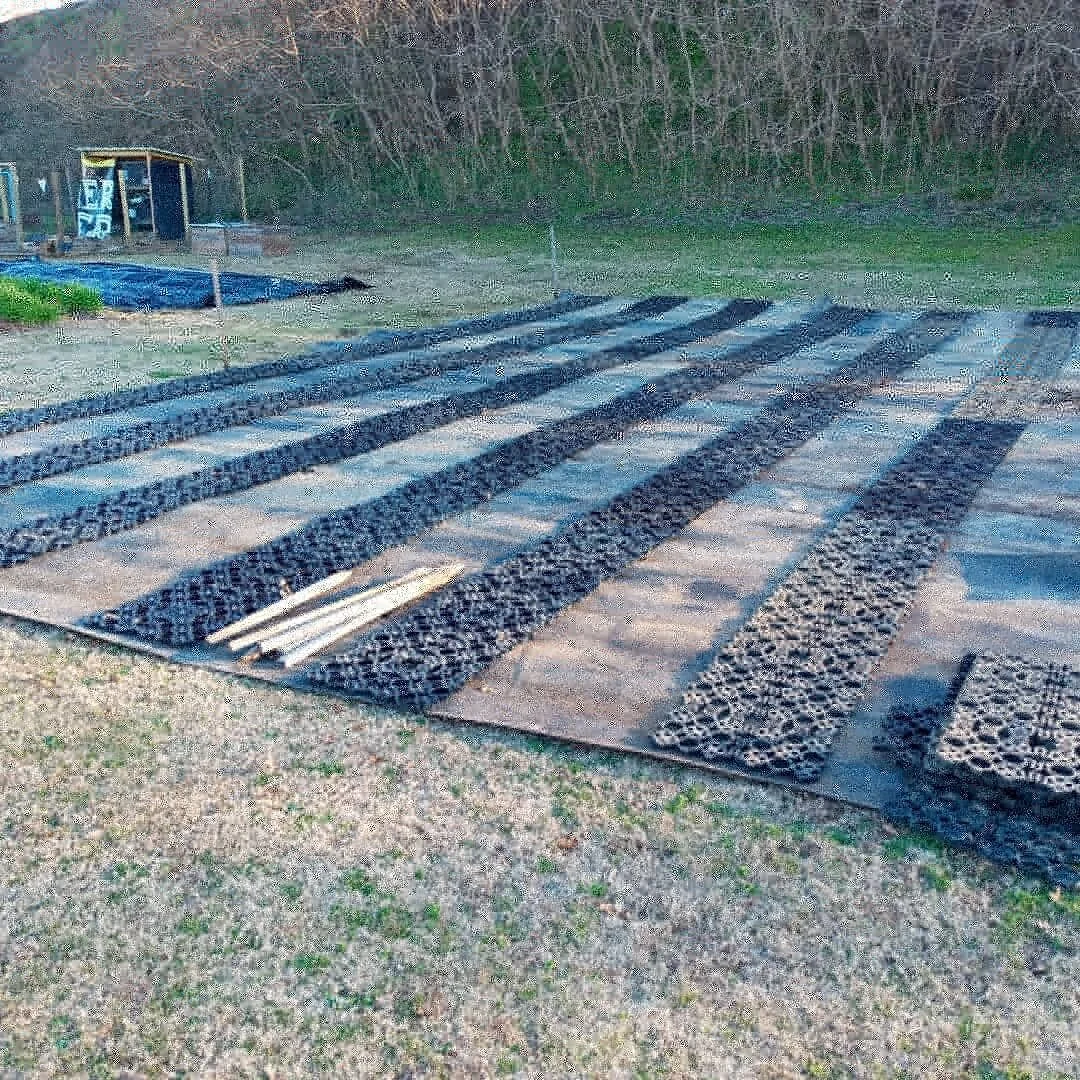
The beginning of the garden - Plastic ground cover and pavers are in place.
Every garden is built to suit the gardener and the requirements of the garden site. Our new garden site is between our big raised bed garden and windmill. It is in full sun, slightly sloped, and we have a hose bib in the ground next to the southeast corner. The site - the whole farm really - is very compacted (it was historically used as a train yard - talk about compaction!) and contaminated with arsenic. So the first thing we did was:
Step 1 - Install The Plastic Barrier
A plastic barrier separates the garden from E.A.T. South’s arsenic contaminated soil and keeps the grass from growing in the garden. We found two large rolls plastic left over from earlier projects. (We think it might be some kind of roofing membrane.) In January, Scouts helped us lay the plastic. Lesson: Plastic is heavy! We had to cut it into sections and put it together like a big quilt.
Step 2 - Creating the Rows
Black plastic is hot, and with the pots sitting directly on the plastic, we were concerned about the pots heating up too much or rotting if the bottoms stayed too wet. To encourage air flow around the pots, we started with rows of left over plastic pavers from another project. Lined up, the plastic pavers created a two foot wide space big enough for a single rows of pots. When we ran out of plastic pavers, we used wooden pallets. The pallets hold two rows of ten and fifteen gallon pots.
Both pavers and pallets provide air circulation under the pots and get them up off the ground. While some stores are starting to sell pallets, they are still a free resource that can be picked up from many businesses. Lesson: HT on pallets means Heat Treated and not treated with Methyl Bromide which is really poisonous. To dig into reusing pallets, 1001 Pallets has a lot of information.
Step 3 - The Pots

Ten gallon fabric pots on wooden pallets
The majority of the containers are heavy duty fabric pots. They are made of a thick, black, heavy felt-like fabric with heavy duty handles sewn on. There are many brands available online, and they come in different sizes from 1 to even 100 gallons. We purchased one, three, five, seven, ten and fifteen gallon pots. Our idea was to use the smaller pots for lettuce and things that are fairly small and the larger pots for summer vegetables like tomatoes and eggplants. The smallest pots didn’t work out as well, and we’ll say a little more about that in lessons learned.
We also planted in seven gallon and one gallon plastic nursery pots and a half plastic barrel. Lesson: Use what you have! Old five gallon buckets can become garden pots (but fabric pots are cheaper than buying new buckets), and Alabama Cooperative Extension will show you how.
Step 4 - Soil
Super soil is a mixture of sand and compost. Bubba’s and Froggy Bottom Materials both sell super soil and will deliver large loads. (See if you can smell the soil first. Occasionally, we’ve had a load that smells a lot like chemical fertilizer.) We mixed the super soil with a balanced organic fertilizer. We used MIghty Grow, but any organic fertilizer should be fine.
Lesson: Fabric pots are light, but large fabric pots full of dirt are HEAVY! For us, filling pots at least half way, putting them in place in the rows, and then topping them off with more dirt was easiest. Our flat-bottomed garden cart became a very useful and helps us move six mostly full pots at once. The soil also settles overnight so jiggle your pots to settle the soil or wait a day and top them off. You and the plants definitely want the most dirt possible in the pot.
Step 4 - The Plants
By early spring, we had about four rows in place and planted cilantro, chard, cabbage, spinach, lettuce, salad turnips and radishes. The lettuce, cilantro, chard, cabbage and spinach were transplanted, and the turnips and radishes were direct seeded into the pots. (The turnips were a small 2 inch salad variety, and they did very well in the containers.)
For the lettuce and spinach, we tried one, three and five gallon pots. In our experience, the one gallon pots aren’t good for much. Even though it was cool, the lettuce and spinach bolted quickly, and the lettuce did not have a good flavor. Three to seven gallon pots were better for the greens. While ten gallon might be too big for lettuce (but maybe not for very large cabbages), the bigger the pot, the better the outcomes.
In spring, we were also just beginning to learn how much water the fabric pots require. Our cilantro (in five to seven gallon pots) bolted very quickly.
For summer, we planted rows of bottle gourd (lau), sweet peppers, so many hot peppers, eggplant, and basil. We also threw in holy basil, sunflowers and marigolds for pollinators. More on that in lessons learned.
Step 5 - Irrigation
Even though this spring and early summer seemed pretty wet, we learned quickly that fabric pots need to be watered at least once a day or more often. We started with a standard oscillating yard sprinkler that a friend loaned to us. The sprinkler covered more than half the garden at once. It was very convenient, but it watered the plastic along with the pots. Water running off in between the rows made a muddy mess in the field. It was also a waste of an important resource.

Summer interns from Tuskegee University explain how they built the drip irrigation lines.
If you want to build a drip irrigation system, drip suppliers like DripWorks and DripDepot offer ideas, videos, and plans on their websites for different farm and garden situations. We modified this plan for a container garden. The main pieces are ½ inch poly tubing for the main lines, ⅛ inch tubing to run from the main line to the spot spitter. (A spot spitter is a plastic stake that emits a spray of water into a container.) Each set of lines also required an end cap at the end of each mainline tube, t-shaped connectors, barbs to connect the ⅛ in tube to the main line, and a connector to hook it all up to a garden hose. Not all drip irrigation parts are compatible which was a big lesson we’ll share about in our next post.
At this point, we’ve covered the main parts of installing the garden - the ground barrier, rows, pots, soil, plants and irrigation. In the next post, we’ll cover what we learned about fertilizing, managing pests and other container garden insights.